How to manage your property photos
Introduction
Images play a fundamental role in the creation of real estate advertisements since, in the vast majority of cases, they stand out more than the descriptive text itself. Paying more attention to the quality of your photos could mean that more potential clients could be interested in your property.
Pre Requisites:
To add photos to your property you will need:
- A listing previously created in Private Mode. If you haven't already, check out our article “How to Publish a Listing”.
- Real photographs of the property, without watermarks, contact information, or logos.
Step 1 - Manage Images
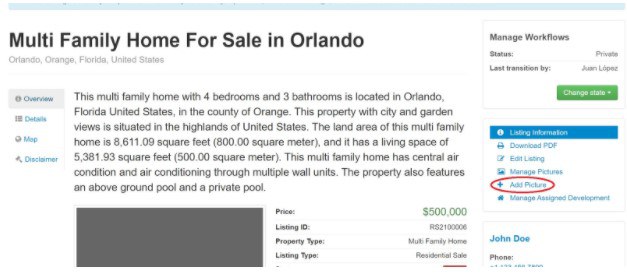
As soon as you have finished creating your listing and the status is still private, you will have a preview of your listing with a gray square in the middle. This figure represents the main image or cover image of your listing. To add images you need to go to the menu bar on the right and select the option “Add Picture” below.
Step 2 - Add Images
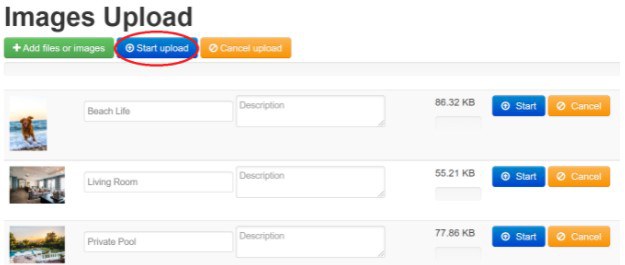
There you will find the image upload buttons "Add files or images" in green, "Start Upload" in blue, and in orange “Cancel Upload”. For this step you must click on the green button "Add files or images" to start the image selection process.
After this you will find in the same workflow menu “Add files or Images”

Step 3 - Image Selection
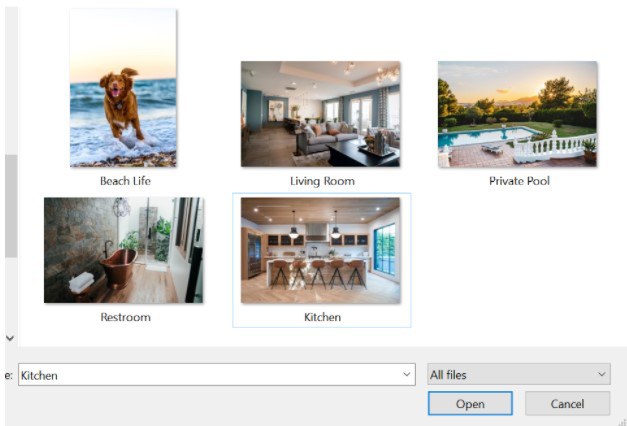
Once you click the green button, the system will display a pop-up window that corresponds to the file browser of your computer or device, which will allow you to select the images of the property.
You can select more than one image at a time using either "Ctrl + Click" or "Shift + Click".
Then click “Open”
Step 4 - Add title and description
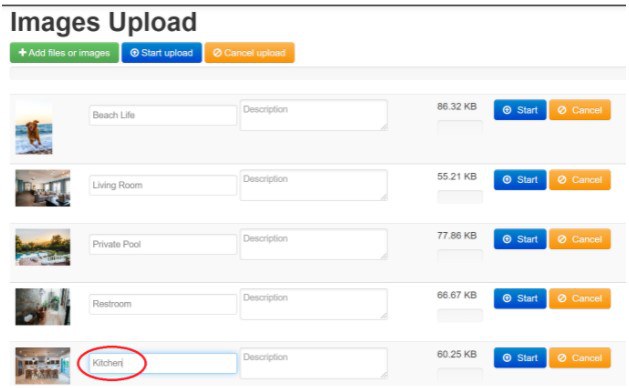
The images you select will appear in thumbnails. On the right side of each photograph you will find two boxes, the first to add a title and the second a description of it. It is highly recommended that you replace the file name with a more descriptive title as this will be shown to the website visitors who are looking at your listing.
Step 5 - Remove Image Before Upload
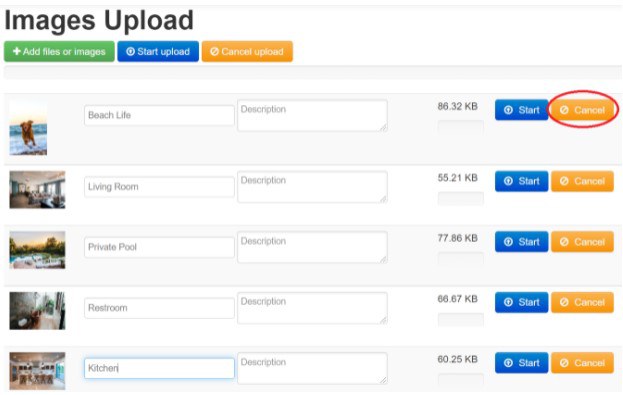
In case you change your mind and you don’t want to upload a specific photo, you can discard that photo by clicking the orange "Cancel" button, located to the right of each photo.
Step 6 - Start Uploading
If you want to upload all the photos to the system in a single step, you can click on the blue "Start upload" button in the top menu bar. In case you want to upload one image at a time, click on each blue "Start" button located on the right side of each photo.
Step 7 - Upload Additional Images
You can continue selecting more photos by clicking the "Add files or images" button as many times as necessary.

Step 8 - Check Photo Upload
To check that the images have been uploaded successfully, you can access the listing by clicking on the title of the publication that appears at the top.

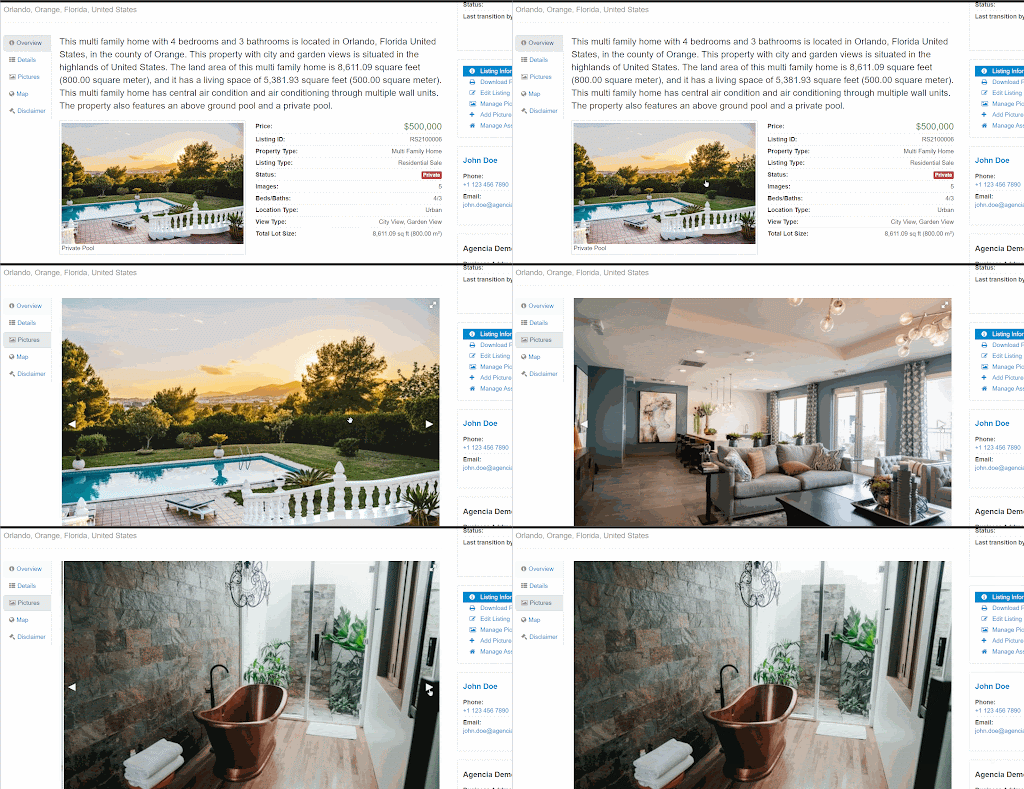
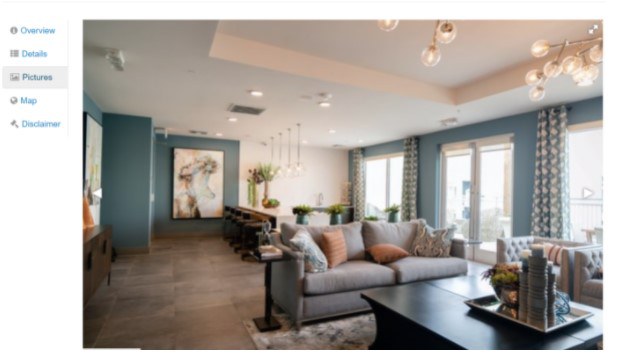
When looking at the listing detail overview, you will now notice that the gray square has been replaced by the first image you uploaded. It is very important to select your best image as the first image since it will always be more visible to the website visitors. Later in this tutorial, you will find out how to easily reorder these images. Click on this image in order to view the image gallery, and click on the right or left arrows to scroll through all of the images.
Step 9 - Making Changes to Images
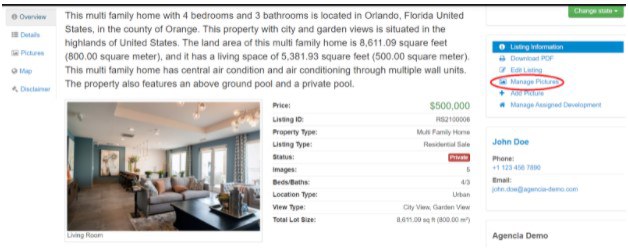
Anytime you would like to make any changes to the images, you must click on "Manage Pictures" that appears on the right side of the publication.
Step 10 - Edit images
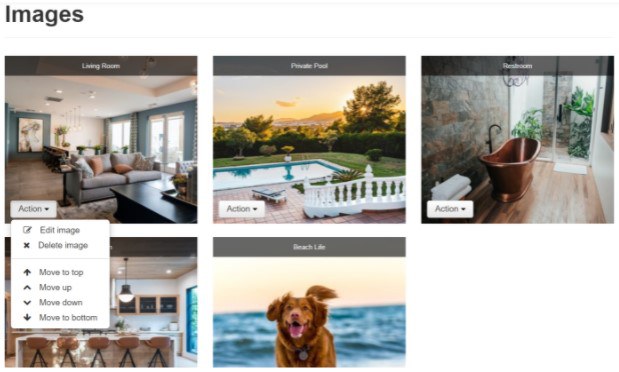
There you will find all the photos that make up the listing’s image gallery. At the bottom of each photo you will find the "Action" button. When you click on “Action,” it displays several options as shown in the image.
Step 11- Add Information in Another Language
In order to add the image title in another language, click on the "Edit image" option. There you can change the title and description or add that information in another language. You must select the option "Add Translation", choose the language you want, and add the information in the chosen language. Finally you must click on the "Save" button at the bottom for the changes to be implemented.
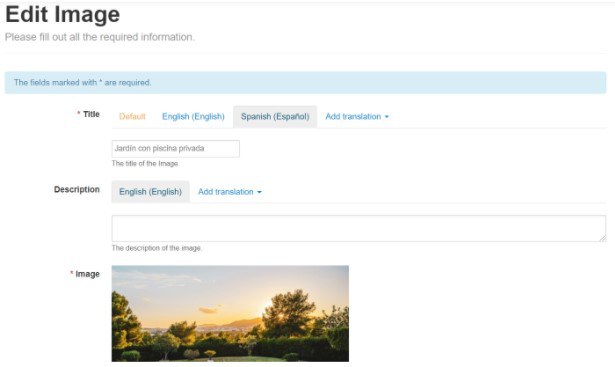
Step 12 - Delete Images
If you want to delete any of the photos, you must click on the "Action" button and then select the option "Delete image".
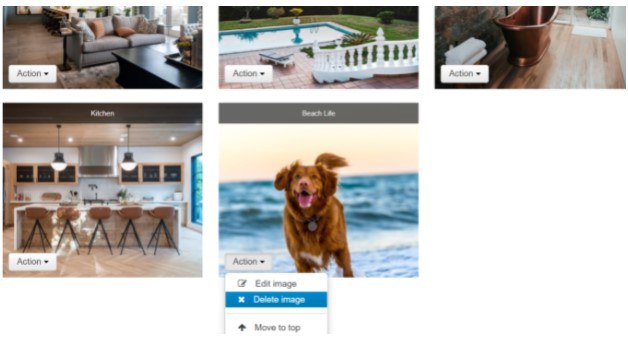
Step 13 - Reorder the Images
To reorder the images there are several options, you can simply click on the image while holding the mouse button down and drag it to the position you want.

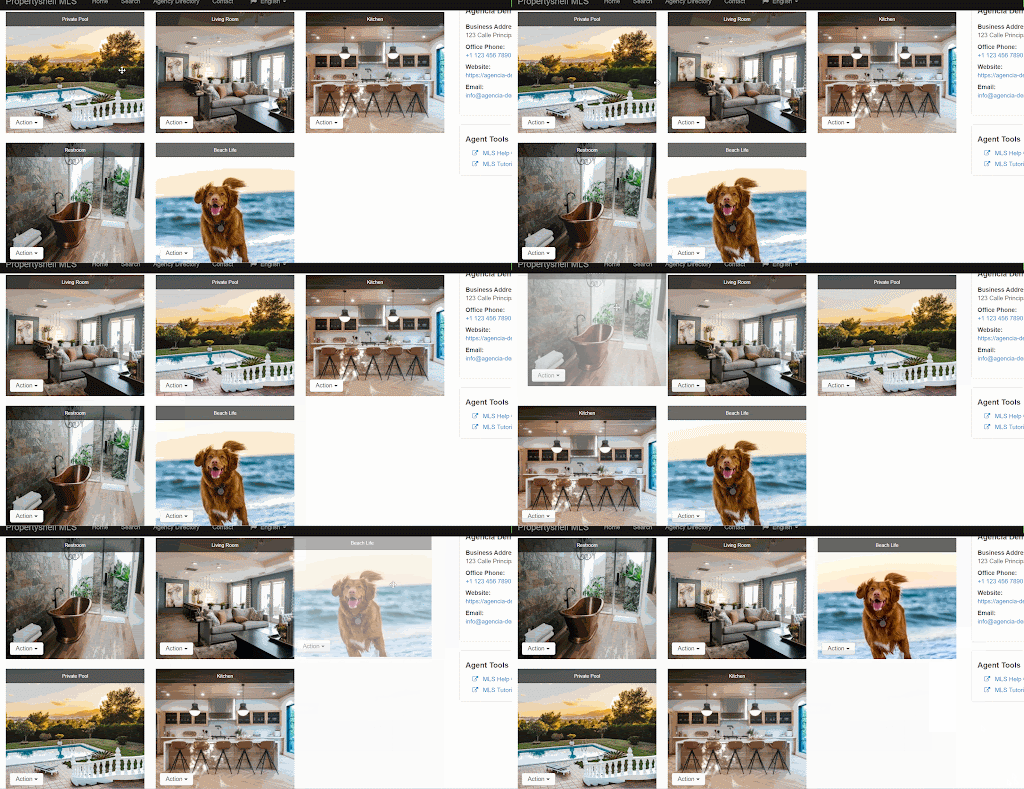

Step 14 - Review the Final Gallery
Remember that whenever you’d like to return to the main listing detail overview, you just have to click on the listing title.
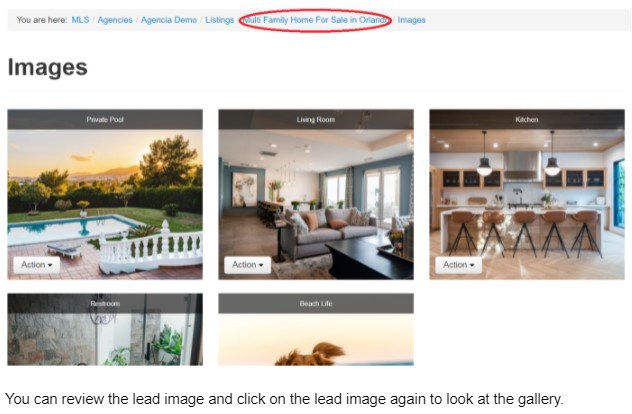
You can review the lead image and click on the lead image again to look at the gallery.
Conclusions and Recommendations:
We recommend using keywords when you add a title for your images, so that your listing will be better positioned in the search engines which will generate you better results.
You can customize the titles in 7 different languages.
No. of recommended photos: between 15 to 30 photos
Minimum number of photos: 4 (2 indoor / 2 outdoor).
Recommended minimum size: 1280px * 720px
JPG format only
Need more help?
